Best Soil for Dwarf Japanese Cedar: Drainage and pH Tips
Dwarf Japanese Cedar thrives when you get the soil right. This slow-growing evergreen shrub isn't fussy, but it does have specific needs: acidic soil in the 5.0 to 6.5 pH range, consistent moisture, and drainage that prevents waterlogging. Get the foundation right at planting time, and your cedar will establish reliably and reward you with decades of dense, attractive foliage.
Understanding the Ideal Soil Profile
Dwarf Japanese Cedar needs what feels like a contradiction: soil that stays moist but drains well. The key is texture and structure, not moisture alone. The plant prefers moist, humus-rich, well-drained soil. In practice, this means soil that holds water against gravity for hours or even a day or two, but doesn't accumulate standing water or become soggy.
Sandy soil that dries out between waterings is not ideal. Clay soil that holds water for weeks creates root rot risk. The sweet spot is loamy soil with organic matter worked in. A 40-50% sand or perlite component, combined with peat moss or compost, creates the balance this plant prefers.
This plant does not tolerate standing water. Phytophthora root rot and other root pathogens thrive in waterlogged sites. Even clay soil can work if drainage is adequate, meaning water moves through it within 24 to 48 hours of heavy rain or watering.
Soil pH: Staying in the Acidic Range
Dwarf Japanese Cedar is an acid-loving plant. It prefers soil pH between 5.0 and 6.5. Below 5.0, nutrient availability can become imbalanced; above 6.5, the plant often shows signs of nutrient stress, especially iron deficiency, which appears as yellowing foliage. Testing your soil pH before planting is the most reliable way to plan amendments.
If your soil tests above 6.5, lower the pH by adding sulfur or an acid mulch like pine needles. If it tests below 5.0, add ground limestone to raise it slightly. Both adjustments take time to fully integrate into the soil, so apply them several weeks before planting when possible.
After planting, use an acidic fertilizer formulated for azaleas or rhododendrons. These products are pH-buffered and help maintain the acidic environment the plant prefers without requiring constant monitoring.
Drainage: The Non-Negotiable Requirement
Poor drainage is the leading cause of decline and death in Dwarf Japanese Cedar. Waterlogged roots lead to root rot, including Phytophthora root rot and general soil-borne pathogens. The plant will show foliage dieback, browning, and eventual decline if water stands around the root zone.
Check your site's drainage before planting. On heavy clay, dig a hole 12 inches deep and 12 inches wide, fill it with water, and observe how long it takes to drain. If water remains after 48 hours, either amend the soil heavily with sand and peat moss, plant in a raised bed, or choose a different location.
Even in acidic soil, poor drainage will kill the plant. So prioritize drainage design before thinking about pH adjustment. A well-draaining site with slightly alkaline soil is safer than a poorly drained acidic site.
Materials and Amendments Needed
Before you dig, gather these materials for a typical planting (one 3 to 5-gallon container shrub in a 2-foot-wide planting hole):
- Peat moss or coconut coir, 5 to 10 gallons
- Perlite or coarse sand, 5 to 10 gallons
- Compost (pine bark or leaf compost preferred), 3 to 5 gallons
- Sulfur or limestone if pH adjustment is needed (amount depends on soil test; follow product instructions)
- Slow-release acidic fertilizer (azalea/rhododendron type), 1 to 2 tablespoons
- Mulch: pine straw or shredded bark, 2 to 3 inches deep for the planting area
These amounts are approximate. The goal is to amend the backfill soil so that the final mix is roughly 40% drainage material (perlite or sand), 40% organic matter (peat or coir and compost), and 20% existing site soil. This creates a transition zone between the planting hole and native soil.
Step-by-Step Soil Preparation
Step 1: Test your soil pH. Use an inexpensive soil test kit from a garden center or send a sample to your local extension service. Record the result. This determines whether you need sulfur or limestone.
Step 2: Choose the planting site. Dwarf Japanese Cedar grows in full sun to part shade. Some afternoon shade helps in hot or dry climates to reduce foliage scorch. Avoid sites that collect water or stay wet for extended periods after rain.
Step 3: Dig the planting hole. Make it slightly wider than the root ball (3 to 4 inches wider on all sides) and no deeper than the root ball itself. A hole that's too deep causes settling and waterlogging around the crown. The top of the root ball should sit level with the surrounding grade.
Step 4: Prepare the amendment mix. In a wheelbarrow or on a tarp, combine your backfill materials. Mix peat moss, perlite, and compost thoroughly with some of the native soil you removed from the planting hole. The goal is a fluffy, crumbly texture that drains quickly but holds some moisture.
Step 5: Adjust pH if needed. If your soil test showed pH above 6.8, mix in sulfur according to the product label. If pH was below 4.8, add ground limestone. Wet the amended soil lightly and let it rest for 1 to 2 weeks if possible, then retest if doing a major correction.
Step 6: Place the plant and backfill. Remove the Dwarf Japanese Cedar from its container and set it in the planting hole. The top of the root ball should be level with the ground. Backfill with your amended soil mix, firming it gently as you go. Do not compact heavily; loose, crumbly soil drains better. Water thoroughly to settle the soil and remove air pockets.
Step 7: Mulch and fertilize. Apply 2 to 3 inches of mulch (pine straw or shredded bark) around the base, keeping it 2 inches away from the trunk. Sprinkle the slow-release acidic fertilizer on top of the mulch according to the product label. Water again to activate it.
Step 8: Monitor and water. For the first growing season, keep soil consistently moist but never waterlogged. In spring or early fall, when the plant is most resilient to transplant shock, water deeply twice weekly if rain doesn't provide that moisture. Reduce frequency in winter or once the plant is established (after the first year).
Common Mistakes to Avoid
Planting too deep. Even an inch too deep causes crown rot and waterlogging. The root ball's top edge should be visible, not buried. This is the single most common planting error across all shrubs.
Over-amending with compost. Too much organic matter, especially in poorly drained sites, actually worsens drainage because it holds water. Limit compost to 20 to 25% of the backfill mix and balance it with perlite or sand.
Using clay-based potting soil or black topsoil. These retain water too aggressively for this plant. Use peat, perlite, and compost instead.
Ignoring existing soil drainage. A beautifully amended planting hole won't save a shrub if it's surrounded by clay that collects water. Address site drainage before addressing soil pH.
Skipping the mulch or applying it too close to the stem. Mulch moderates soil temperature and moisture, but piled against the stem it causes rot. Keep mulch 2 inches clear of the base.
Watering on a fixed schedule. Water when the top inch of soil feels dry to the touch, not on a calendar. Overwatering is more damaging than underwatering, especially to an establishing shrub.
Expected Results and Timeline
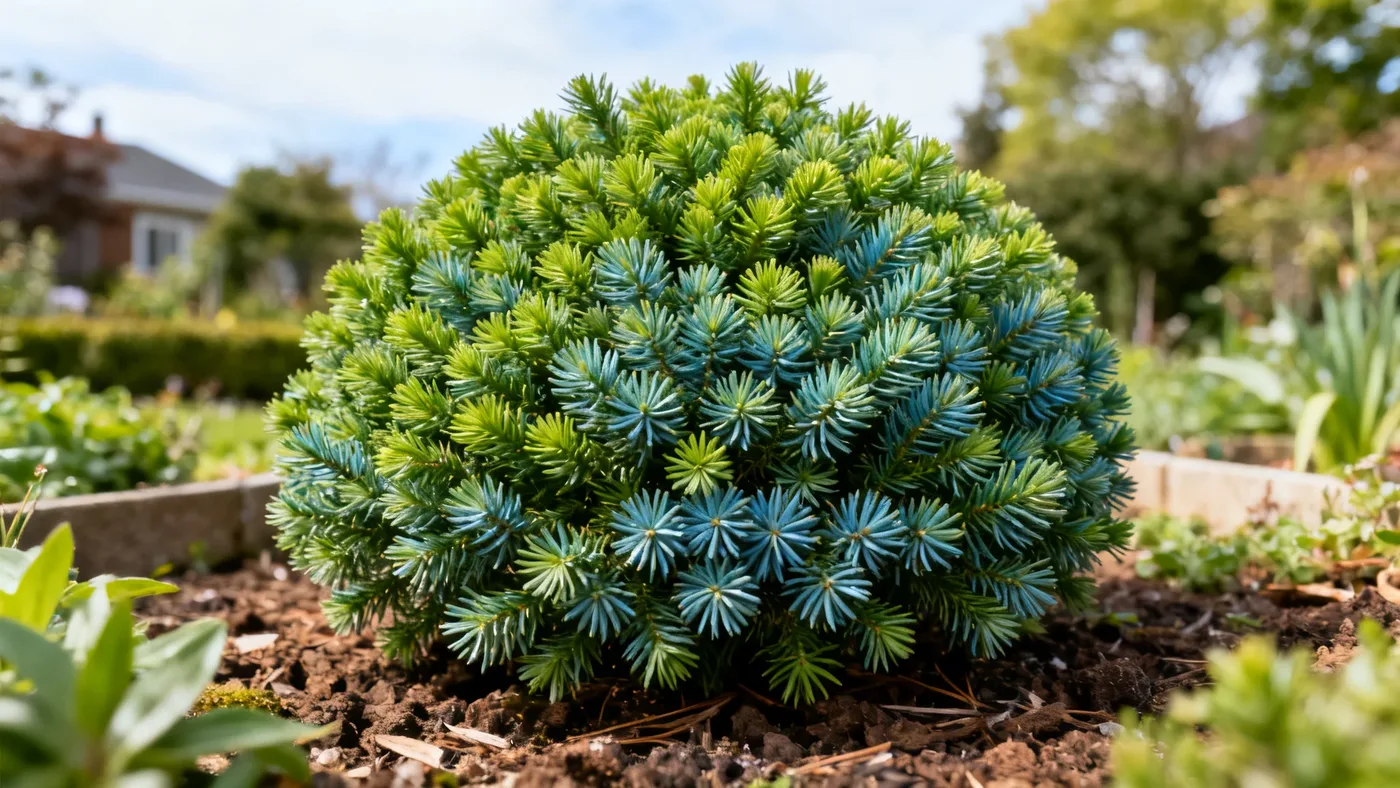
A Dwarf Japanese Cedar planted in properly prepared soil will show visible new growth within 4 to 6 weeks, assuming adequate water and light. Growth is slow, roughly 3 to 6 inches per year, but consistent if conditions are right. The plant will form a dense, mounded globe if left unpruned, reaching a mature size of 3 to 6 feet tall and 4 to 6 feet wide over time.
Foliage should remain a blue-green to deep green color. In winter, it's normal for the foliage to take on a bronze or purple cast as temperatures drop; this is not disease or damage, just a seasonal color shift. The plant will return to green as temperatures warm in spring.
For additional guidance on ongoing care, refer to our Dwarf Japanese Cedar care guide. If you're planting in cooler regions, confirm your hardiness zone in our zone guide for Dwarf Japanese Cedar.
Quick Reference: Soil and Amendment Checklist
| Element | Target Value | Action |
|---|---|---|
| Soil pH | 5.0 to 6.5 | Test before planting; add sulfur if above 6.5, limestone if below 5.0 |
| Drainage | Water drains within 24 to 48 hours | Dig test hole and observe; amend with perlite/sand if needed |
| Backfill mix | 40% drainage material, 40% organic matter, 20% site soil | Combine perlite, peat, compost, and native soil in a wheelbarrow |
| Planting depth | Root ball top level with ground | Measure twice, dig to root ball height, never deeper |
| Mulch depth | 2 to 3 inches | Apply 2 inches clear of the stem; refresh yearly |
| Fertilizer | Acidic formulation (azalea/rhododendron type) | Apply 1 to 2 tablespoons at planting, then light annual applications in early spring |
| First-year watering | Consistently moist, not waterlogged | Check top inch of soil; water when dry to touch, typically twice weekly in growth season |