How to Water Dwarf Japanese Cedar the Right Way
Watering a Dwarf Japanese Cedar correctly is the single biggest factor in keeping it healthy and dense. Too little water, and its soft needles scorch and brown in the sun. Too much, and the roots rot in soggy soil. Most gardeners either neglect these plants or drown them with good intentions. This guide shows you exactly how to find the sweet spot: consistently moist but never waterlogged soil.
Understanding Dwarf Japanese Cedar's Water Needs
Dwarf Japanese Cedar does not tolerate drought, especially when young and establishing. Unlike many conifers, it demands regular moisture. The plant's dense, fine-textured foliage loses water quickly when exposed to sun and wind, which is why your watering schedule directly affects whether the needles stay soft and green or turn bronze and crispy.
The plant thrives in moist, humus-rich, well-drained soil. This is not a contradiction: moist means the soil holds moisture, while well-drained means water moves through it and does not pool around the roots. The key is a soil that retains moisture but has adequate air space to prevent waterlogging.
Dwarf Japanese Cedar grows slowly, roughly 3 to 6 inches per year, so a young plant may take a decade or more to reach its mature size of 3 to 6 feet tall and 4 to 6 feet wide. During those early years, consistent watering helps the root system establish and supports steady, healthy growth. Once mature and well-established, the plant tolerates moderate drought better, though it still prefers regular moisture during the growing season.
Materials and Tools You'll Need
- Garden hose with adjustable spray nozzle or soaker system
- Mulch (pine bark, compost, or aged wood chips)
- Watering can (for container plants)
- Soil moisture meter or your finger for testing
- Shovel for amending soil with compost
- Gloves (optional)
Step-by-Step Watering Instructions
Step 1: Check Soil Moisture Before Watering
Push your finger 2 to 3 inches into the soil around the base of the plant. If the soil feels moist and crumbly, hold off on watering. If it feels dry or barely damp, it is time to water. During the growing season (spring through fall), aim to keep the soil at this consistent moisture level, not bone dry and not soggy.
Step 2: Water Deeply and Slowly
Apply water at the soil line, not on the foliage. A light sprinkle is not enough. Water slowly for 10 to 15 minutes, allowing the water to soak 6 to 8 inches deep into the root zone. This encourages the root system to grow deeper and more resilient. If water runs off the surface, pause, let it soak in, then continue.
Step 3: Use Mulch to Retain Moisture
Apply 2 to 3 inches of organic mulch around the base of the plant, starting 4 to 6 inches away from the stem to avoid rot. Mulch acts as a blanket, keeping soil cooler and reducing evaporation so you do not have to water as frequently. Refresh or top up the mulch layer annually, especially in spring.
Step 4: Monitor After Planting
For the first growing season after planting, water more frequently than you will in later years. Spring or early fall planting (the ideal times) gives the plant a window to establish roots before temperature extremes. Water twice a week if rainfall is light, more often if your area is hot and dry. By the second growing season, the plant should be more resilient.
Step 5: Adjust for Rainfall
Rain counts. If your area has received 1 inch or more of rainfall in a week, you can skip supplemental watering. In dry spells, increase frequency. In humid, cool weather, decrease it. The goal is consistent soil moisture, not a rigid watering schedule.
Step 6: Water in Early Morning
Watering early, before the day heats up, allows the foliage to dry quickly and reduces disease risk. Avoid watering late in the evening, when wet foliage overnight can invite fungal issues in humid climates.
Common Watering Mistakes to Avoid
Overwatering
This is the number-one killer of Dwarf Japanese Cedar in home gardens. Standing water and constantly soggy soil cause root rot, particularly Phytophthora root rot. Once roots rot, no amount of fertilizer will save the plant. If you notice foliage dieback, yellowing, or a mushy smell at the base, root rot may be underway. Let the soil dry out slightly between waterings and ensure drainage is excellent.
Underwatering
While less common than overwatering, underwatering causes the needles to scorch brown and crispy, especially in hot or windy sites. Once scorch damage appears, it does not reverse on those needles, but new growth can be healthy if you restore consistent watering.
Watering the Foliage Instead of the Soil
Sprinkler systems that wet the entire plant can waste water and promote leaf spot diseases. Drip irrigation or a soaker hose at soil level is far more efficient and safer for the plant.
Inconsistent Watering
A plant that alternates between bone-dry and waterlogged is stressed. Moisture swings weaken the plant and make it more vulnerable to pests and disease. Aim for steady, moderate moisture.
Ignoring Soil Drainage
If your soil is heavy clay and puddles after rain, the plant will not survive even with careful watering. Amend the soil with compost or aged bark to improve drainage before planting, or choose a better-draining site.
Seasonal Watering Adjustments
Spring (March to May)
As temperatures warm and the plant breaks dormancy, water frequency increases. If you planted in spring, keep soil consistently moist to support root establishment. Established plants need regular watering as growth flushes begin.
Summer (June to August)
This is peak watering season. Heat, sun exposure, and wind drive moisture loss. Young or newly planted trees need weekly watering if rainfall is light. Established plants may need watering twice weekly during heat waves. Afternoon shade helps reduce stress in hot, dry climates. Mulch is essential to extend time between waterings.
Fall (September to November)
As temperatures cool, watering frequency drops. However, fall is still a growth period for roots, so do not neglect moisture. A deep watering in late fall, before soil freezes, helps the plant survive winter stress. Watch for bronze or purple winter color, which is normal and does not indicate drought stress.
Winter (December to February)
In cold climates (zones 5 to 7), the plant is dormant and needs little water if snow or ice is present. In milder zones (8 to 9), winter is mild enough for gentle growth, so occasional watering may be needed if the soil dries out. Avoid heavy watering in winter, as cold, wet soil increases root rot risk.
Signs Your Dwarf Japanese Cedar Needs Water
Drought Stress
- Foliage appears dull, pale green, or slightly yellowed
- Needle tips or entire needles turn brown and crispy
- Foliage becomes loose and droopy rather than turgid
- Fine twig dieback at branch tips
Overwatering or Root Rot
- Foliage yellows evenly across the plant, not just tips
- Soft, mushy texture at the base or near roots
- Sour or musty smell from the soil
- Foliage wilts even when soil is wet (a sign roots cannot absorb water)
- Patches of foliage die back suddenly, starting from the lower interior
If you suspect root rot, stop watering immediately and check the soil. If it is soggy and rank-smelling, aerate or replace the top few inches with fresh, well-draining soil. If the problem is severe, the plant may not recover.
Tips for Success
Plant in a location with full sun to part shade. In hot, dry regions, afternoon shade reduces foliage scorch and water demand. Avoid planting in dense shade, as the plant will become leggy and weak.
Amend the planting hole with compost or aged bark to improve soil structure and water retention. Dwarf Japanese Cedar tolerates clay soil if drainage is adequate, but it dislikes hardpan and pure sand. A balanced soil amendment goes a long way.
Space plants 4 to 6 feet apart if planting multiples. Closer spacing increases humidity around the foliage, which can promote fungal issues in wet climates, but also shades the soil and reduces evaporation.
Once established (after two full growing seasons), Dwarf Japanese Cedar is more forgiving. However, do not assume it is drought-tolerant. Even mature plants prefer regular moisture during the growing season. A long drought will stress the plant and make it vulnerable to spider mites or other pests.
For container-grown plants, watering frequency is higher because pots dry out faster than garden soil. Check container soil daily in summer and water whenever the top inch is dry. In winter, reduce frequency to every 2 to 3 weeks, depending on temperature and pot size.
Expected Results
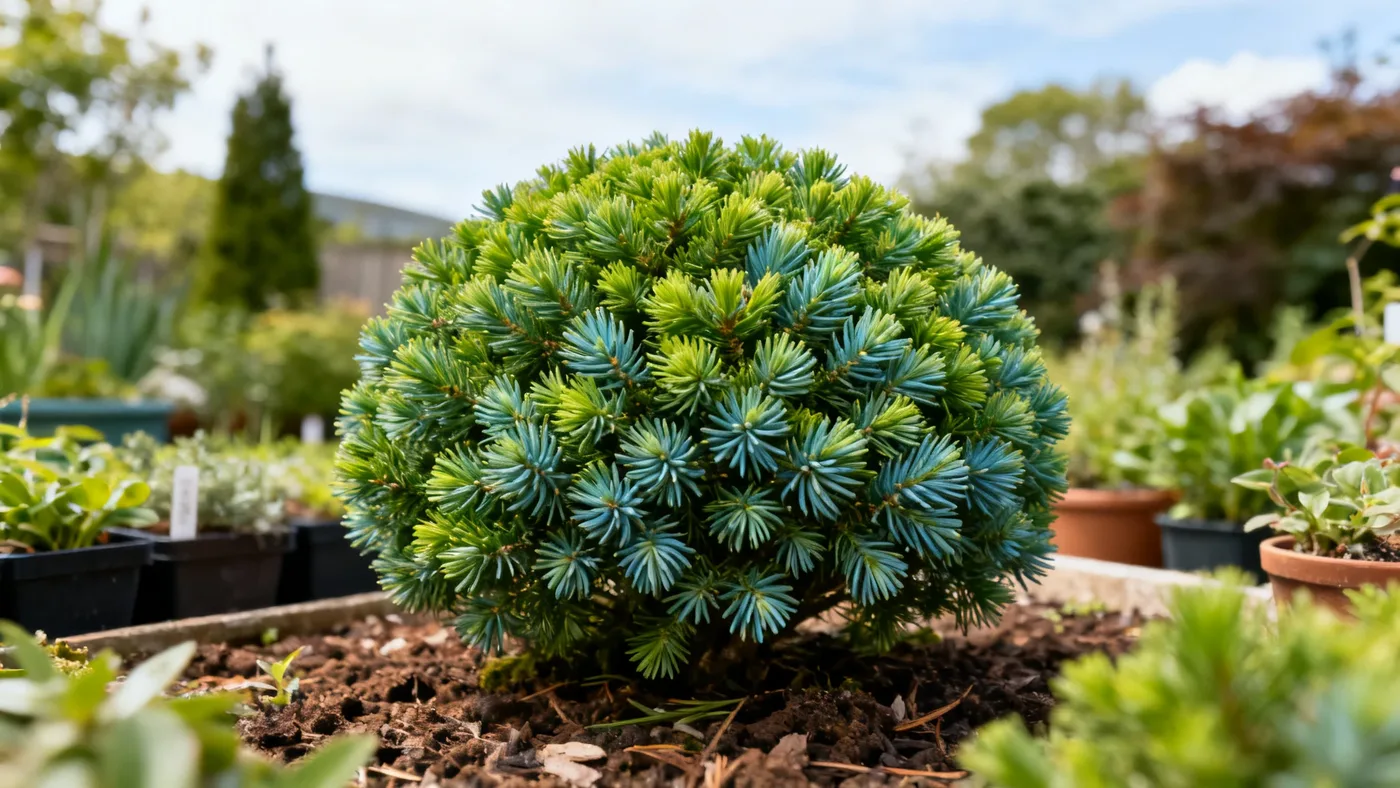
With consistent, proper watering, a Dwarf Japanese Cedar maintains soft, dense blue-green foliage and a tight, rounded mound shape. New growth in spring appears fresh and vigorous. The plant resists pests and disease better than a stressed, underwatered specimen. In winter, the foliage may bronze or purple slightly, which is a normal seasonal response and not a sign of poor care.
If you have neglected your plant and it shows scorch or yellowing, do not give up. Restore consistent watering and improve drainage if needed. New foliage often emerges healthy even if older needles are damaged. Recovery takes weeks to months, but it is usually possible.
Quick Reference: Watering Checklist
| Condition or Season | Watering Frequency | Key Actions |
|---|---|---|
| First growing season (newly planted spring or fall) | 2x per week, or more in drought | Keep soil consistently moist; apply 2-3 in. mulch; check soil twice weekly |
| Established plant, spring growth | 1x per week + rainfall | Water deeply; monitor rainfall; maintain mulch layer |
| Summer (hot or dry climate) | 1-2x per week | Water early morning; increase during heat waves; check soil before each watering |
| Fall (cool, moderate moisture) | 1x per week, taper toward frost | Deep water in late fall before soil freezes; expect normal bronze winter color |
| Winter (dormant or minimal growth) | Minimal; only if soil is very dry | Avoid heavy watering; focus on spring recovery |
| After heavy rain (1+ inch) | Skip watering that week | Let soil drain; only add water if top 3 in. becomes dry |
| Container plants | Check daily; water when top 1 in. is dry | Increase frequency in summer; reduce in winter; use well-draining potting mix |
For a complete overview of Dwarf Japanese Cedar care, see the full care guide. To confirm your plant is hardy in your zone, check which zones Dwarf Japanese Cedar grows in.