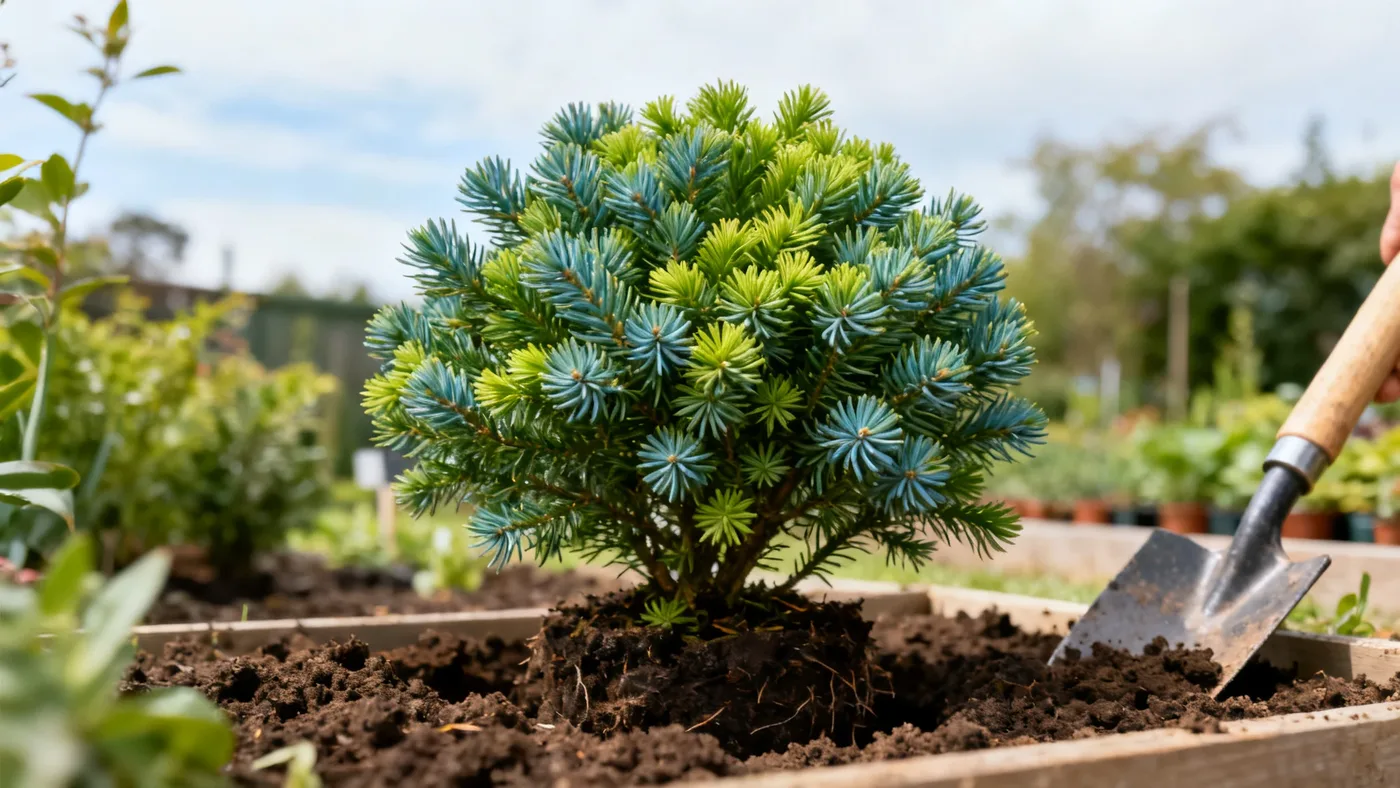
How to Plant Dwarf Japanese Cedar for a Strong Start
Planting dwarf Japanese cedar the right way gives this beautiful conifer the best chance to establish healthy roots and develop into a dense, attractive mound. Whether you're adding one to a rock garden, using it as a foundation shrub, or creating an Asian-inspired landscape, getting the basics right in the first season makes all the difference.
This guide walks you through the entire planting dwarf Japanese cedar process, from site selection through first-year care, with specific details grounded in what this plant actually needs to thrive in zones 5 through 9.
What You'll Need
Before you dig, gather these materials:
- A Dwarf Japanese Cedar specimen, typically sold in a #1 or #3 nursery container
- Acidic, humus-rich potting mix or soil amendment (see Soil Preparation below)
- A spade or shovel
- A garden fork or cultivator
- Mulch: aged pine bark, wood chips, or compost, 2 to 3 inches deep
- A watering can or soaker hose
- Tape measure for spacing
- Soil pH test kit or strips (optional but helpful)
When to Plant Dwarf Japanese Cedar
Timing matters for planting dwarf Japanese cedar. The ideal window is spring or early fall, when soil is workable and temperatures are mild. These seasons allow the plant to establish roots before temperature extremes arrive.
Spring planting gives the cedar the full growing season to settle in before winter. Aim for after your last frost date but before the heat of summer.
Early fall planting works just as well, typically from late August through September. The cooling temperatures reduce stress on the plant while soil remains warm enough for root growth. Avoid planting in late fall or winter when the ground is frozen or waterlogged, as the plant cannot establish properly.
Choosing a Planting Site
Dwarf Japanese cedar grows best in full sun to part shade. In cooler zones (5 to 7), full sun is ideal for the densest, most compact growth. In warmer zones (8 to 9) or in regions with intense afternoon heat, afternoon shade reduces stress on the foliage and helps prevent scorch during dry spells.
Look for a spot with good air circulation to minimize humidity-related problems. Avoid planting in low-lying areas where water collects or in spots that stay soggy after rain. The plant is not drought tolerant while establishing, but it is intolerant of standing water, so drainage is critical.
Soil Preparation
Dwarf Japanese cedar is particular about soil. It prefers acidic, humus-rich, well-drained soil with a pH between 5.0 and 6.5. If your native soil is alkaline or clay-heavy, amend it before planting.
Testing your soil pH: A quick soil test strip from any garden center tells you if your soil is in the target range. If your pH is 7.0 or higher, work in sulfur or aluminum sulfate to acidify the soil over a few weeks before planting. If it's already acidic, you can proceed.
Amending the planting hole: Dig a hole that is 1.5 times as wide as the root ball and roughly the same depth. Mix the extracted soil with 30 to 40 percent peat moss, coconut coir, or composted pine bark to improve drainage and acidity. Your goal is a loose, well-aerated mix that stays moist without waterlogging.
The plant tolerates clay soil if drainage is adequate, but poor drainage causes root rot. If your site is naturally boggy, consider planting in a raised bed or mound rather than below grade.
Step-by-Step Planting Instructions
Step 1: Prepare the Planting Hole
Measure the root ball of your Dwarf Japanese Cedar. Dig a hole that is 1.5 times the width of the root ball and slightly shallower than its depth. For a typical #1 container specimen, this is roughly 12 to 15 inches wide and 10 to 12 inches deep. Place the amended soil mixture at the bottom of the hole, creating a slight mound.
Step 2: Remove the Plant from the Container
Water your cedar well in its pot about an hour before planting to loosen the root ball. Gently tip the pot to one side and slide the plant out, or cut the pot if the roots are bound. Loosen the outer roots gently with your fingers, especially if the plant has been in the container for a long time. This encourages roots to grow outward into the surrounding soil.
Step 3: Position the Plant
Set the cedar on the mound of amended soil. The top of the root ball should be level with or very slightly above the surrounding grade. Planting too deep smothers the stem and increases rot risk; planting too shallow exposes roots. Step back and check that the plant is upright and positioned where you want it.
Step 4: Backfill the Hole
Begin filling around the root ball with your amended soil mix. Use both hands to gently firm the soil as you go, eliminating large air pockets but not compacting heavily. Water lightly every few inches of backfill to settle the soil and check for settling. Continue until the hole is full and the soil surface is level with the surrounding grade.
Step 5: Create a Water-Retention Basin
Form a shallow basin around the base of the cedar by piling soil into a low berm, about 2 inches high and roughly 6 inches out from the stem. This catches and holds water during the critical establishment period, ensuring moisture soaks in rather than running off.
Step 6: Apply Mulch
Spread 2 to 3 inches of aged bark mulch or wood chips over the planting area, extending it out to roughly the width of the plant's future canopy. Keep mulch 2 to 3 inches away from the stem itself to prevent rot and pest damage. Mulch moderates soil temperature, retains moisture, and suppresses weeds.
Step 7: Water Thoroughly
Water the newly planted cedar deeply and slowly, allowing water to soak in fully. The soil should be moist but not waterlogged. Water reaches the bottom of the root ball and fills any remaining air pockets. This is your chance to spot settling or gaps; add soil if needed.
Spacing Multiple Plants
If you are planting more than one Dwarf Japanese Cedar, space them 4 to 6 feet apart. This accounts for their mature width of 4 to 6 feet and allows room for air circulation. Planting closer than 4 feet risks overcrowding as they mature, even though their slow growth rate (roughly 3 to 6 inches per year) means it will take years to become noticeable.
First-Year Care and Establishment
The first season is critical. Dwarf Japanese cedar is not drought tolerant while establishing, so consistent moisture is essential.
Watering: Water the plant every 2 to 3 days during the first month, then gradually extend intervals to once weekly through the growing season. Check soil moisture 2 inches below the surface; if it feels dry, water deeply. Reduce frequency in fall as growth slows, but never allow the soil to dry out completely.
Monitoring: Watch for wilting, yellowing, or browning, which indicate stress. In hot, dry periods or windy sites, afternoon shade cloth can reduce water loss during the first summer.
Fertilizing: Resist over-fertilizing. A light application of balanced or acid-formulated (azalea/rhododendron-type) fertilizer in early spring of the second year is sufficient. Heavy feeding promotes soft growth and can predispose the plant to pest damage.
Tips for Success
- If your tap water is alkaline, collect rainwater for irrigation during establishment; it reduces pH stress.
- Inspect the plant's base weekly in the first month; any settling gaps allow the basin to drain prematurely and should be refilled with amended soil.
- Winter bronzing (a bronze or purple-brown color shift in cold months) is normal and not a sign of damage; the foliage greens back up in spring.
- In regions with intense afternoon sun (zones 8 and 9), afternoon shade during the first summer reduces needle scorch risk.
- Avoid planting near gutters or downspouts where concentrated water flow may cause waterlogging.
Common Mistakes to Avoid
Planting too deep: Burying the stem below grade is the most common error. It traps moisture around the stem and invites root rot. Keep the top of the root ball level with the grade.
Ignoring soil drainage: Even with the right pH and water schedule, poor drainage kills this plant. If water pools in the planting hole or site stays soggy for days after rain, drainage is inadequate. Use a raised bed or work in sand and organic matter to improve it.
Overwatering or underwatering: The plant wants consistent moisture, not soggy soil. Check before watering; if the top inch is still moist, wait another day. Conversely, allowing soil to dry out during the establishment period stresses the plant and invites spider mite damage.
Wrong pH: Acidic soil (pH 5.0 to 6.5) is not optional. Planting in neutral or alkaline soil leads to nutrient deficiencies and poor growth, even if all other factors are correct. A $5 pH test is worth it.
Planting at the wrong time of year: Planting in midsummer heat or late fall when soil temperatures drop too far slows establishment. Spring and early fall are far more forgiving.
Expected Results
A well-planted Dwarf Japanese Cedar typically shows visible new growth within 4 to 6 weeks of spring planting. By the end of the first growing season, the root system is established and the plant is less dependent on frequent watering. Growth is slow but steady, roughly 3 to 6 inches per year, so patience is part of the design.
It takes 10 to 15 years for the plant to reach a substantial mature size, but the payoff is a beautiful, long-lived evergreen mound that provides structure and interest in the landscape for decades. For more on caring for your cedar after the first year, see our Dwarf Japanese Cedar care guide.
Quick Reference: Planting Checklist
| Task | Timing or Detail |
|---|---|
| Choose planting season | Spring or early fall, zones 5–9 |
| Select site | Full sun to part shade; afternoon shade in zones 8–9 |
| Test soil pH | Target 5.0–6.5 (acidic) |
| Dig hole | 1.5x the width of root ball; same or slightly shallower depth |
| Prepare amended soil | Mix native soil + 30–40% peat moss or coir |
| Remove from pot | Water well; loosen outer roots gently |
| Position plant | Top of root ball level with or slightly above grade |
| Backfill | Fill and firm gently; water as you go |
| Create water basin | Low berm 2 inches high around base |
| Apply mulch | 2–3 inches, 2–3 inches from stem |
| Initial watering | Deep, slow soak after planting |
| Space multiple plants | 4–6 feet apart center to center |
| First-year watering | Every 2–3 days first month, then weekly |
| Fertilize | Light application in early spring of year 2; avoid overfertilizing |